Flowers For Mum: A Spring Time Craft Tutorial

If you're as excited as we are to feel spring finally on its way, no doubt you'll be itching to get outside and get outside and enjoy it! This craft makes use of all those gorgeous flowers that you'll see springing up, and is a great activity for involving all the kids… even the little ones.
This project is created in 3 stages; collecting and pressing flowers, creating your clay bases, and finally decoupage. This makes it a perfect activity for younger children or those with shorter attention spans, and a great way to create a lovely and unusual Mother's Day gift together.
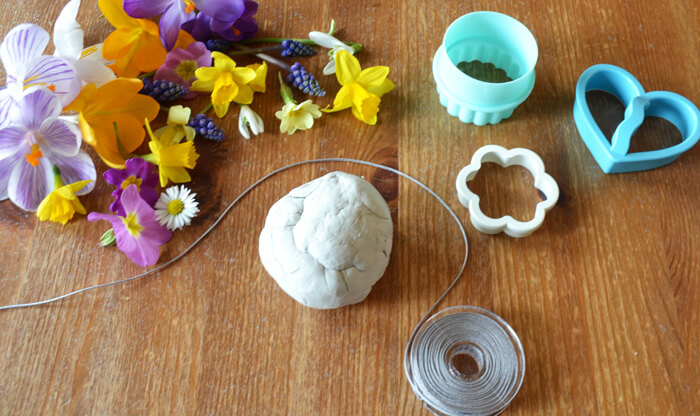
You Will Need:
-Freshly picked flowers
-A flower press, or several heavy books and sheets of plain paper
-Air dry clay
-Cookie cutters
-Decoupage medium
-Skewer or pencil
-String or jewellery thread
Part 1: Pressed Flowers
Collecting Flowers
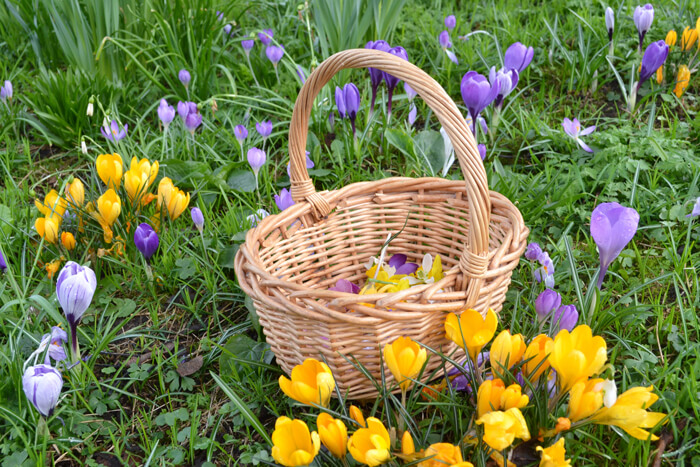
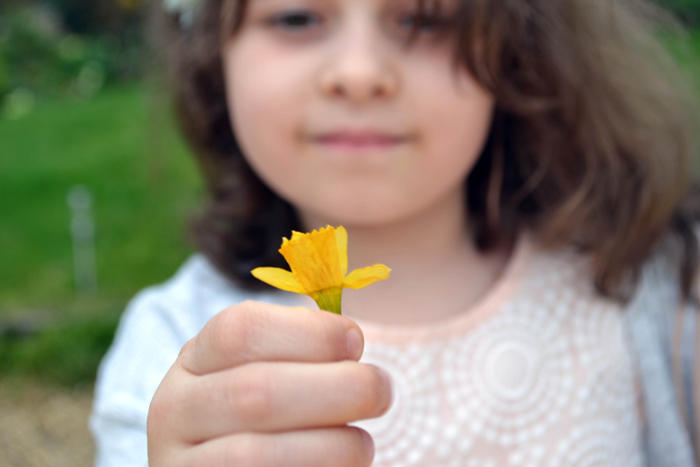
Your first step is to go somewhere lovely to take a walk and find some pretty flowers to pick! If you're lucky enough to have some growing in your own garden you won't have to go very far, but otherwise it's worth looking around local areas and public footpaths. Please remember though that it's important to be respectful of the location, take only a few flowers, and avoid trespassing on private land.
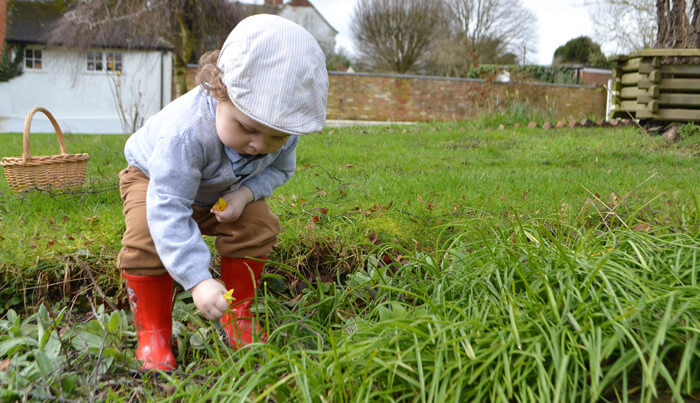
If you struggle finding somewhere to go, try asking friends and family. Our location for this post was allotment space belonging to some friendly neighbours!

Try to gather a good selection of different colours and types. Each flower will look different by the time it's pressed, and some will fade more than others. But don't underestimate the common flowers and weeds; daisies, clover and other small leaves press beautifully too!
This makes for a great opportunity to involve smaller children and toddlers. They'll enjoy hunting for different types of flowers, and it's a lovely way to spend an hour or two before nap time!

Flower Pressing
Once your flowers have been collected, it's time to press! You can do this with a flower press if you have one, alternatively you can do just as good a job with a few heavy books. Place a piece of plain paper on an open page (the paper is important, or else your flower may stain your book, or your book might print onto your flower!) and carefully position your flower onto it.
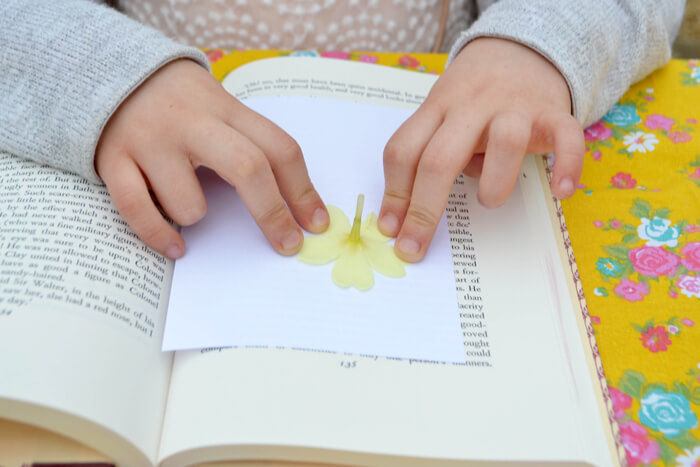
Next, place another piece of paper on top of your flower, and close the book tightly onto it, sandwiching your flower and paper between its pages.
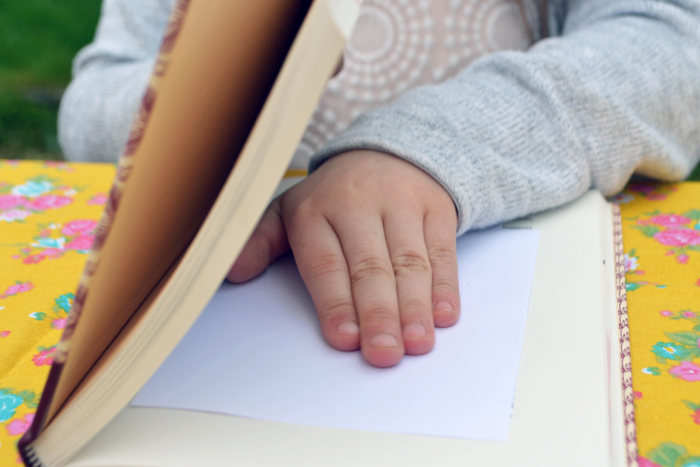
Add a few more books on top to really weight it down, and keep them somewhere safe for 2-4 weeks.
However, if you don't have time to wait that long (or you're just a little impatient!) you can also press your flowers much more quickly using an iron. Press your flower between two absorbent pieces of paper as before, and flatten with a heavy book. You can then use an iron on low heat to press both sides of the paper for up to 15 seconds at a time, turning and waiting for the paper to cool between turns, until the flower is completely dried out and stiff. However, this method of pressing is only suitable for adults, and not for little hands!
Whichever pressing method you use, be sure to remove your flowers very carefully to avoid damaging them, and ensure they are completely dry and stiff before removal.
Part 2: Clay
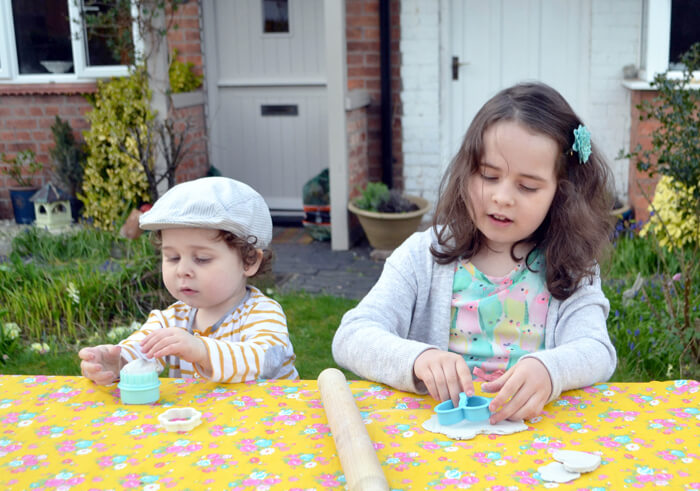
If you're being patient and waiting for your flowers to dry out naturally, this is a great time to work on your clay bases! We're using a white air dry clay, but it is also widely available in terracotta colour too. This step is suitable for all ages, but very small children may require help from an adult (or big sibling!)
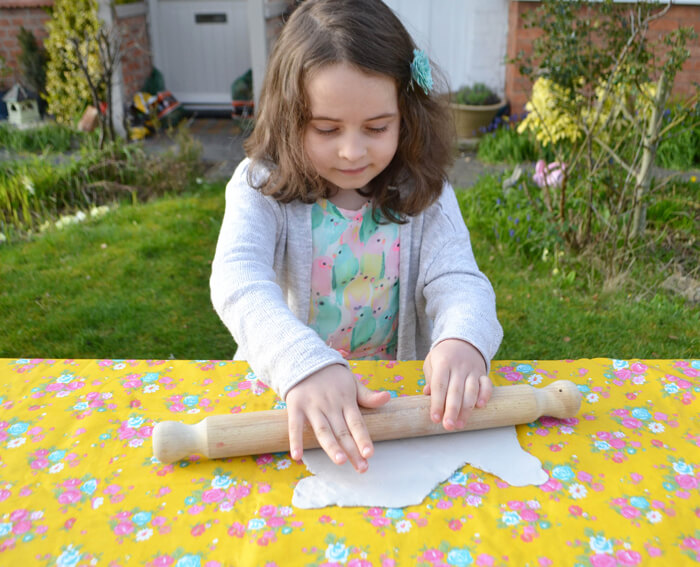
First, roll your clay out nice and flat. The thinner you roll it out, the quicker it will dry.
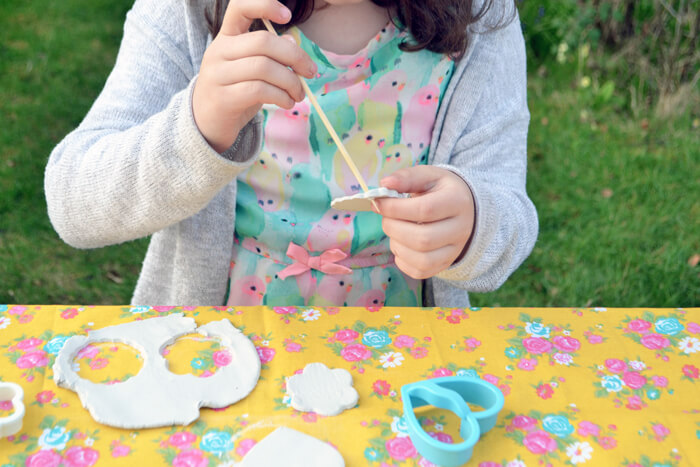
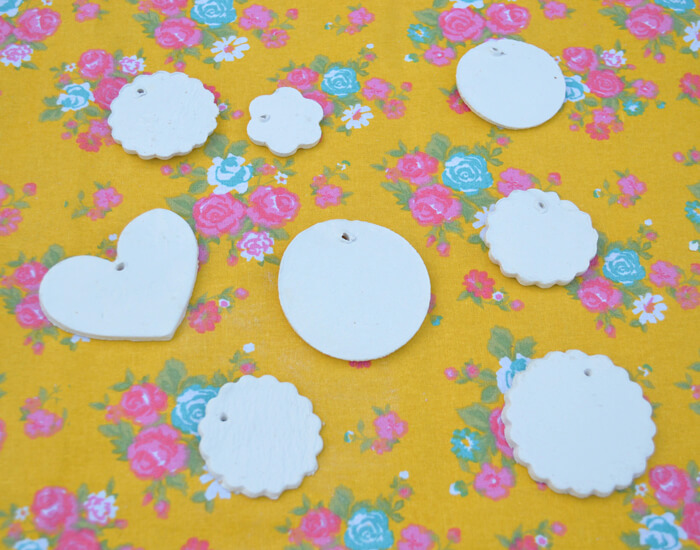
Next, use your cookie cutters to cut out your shapes. You might want to experiment with a variety of shapes and sizes.
Try not to worry about irregularities, uneven thickness or leaving little fingerprints- these all add to the charm of a handmade gift!
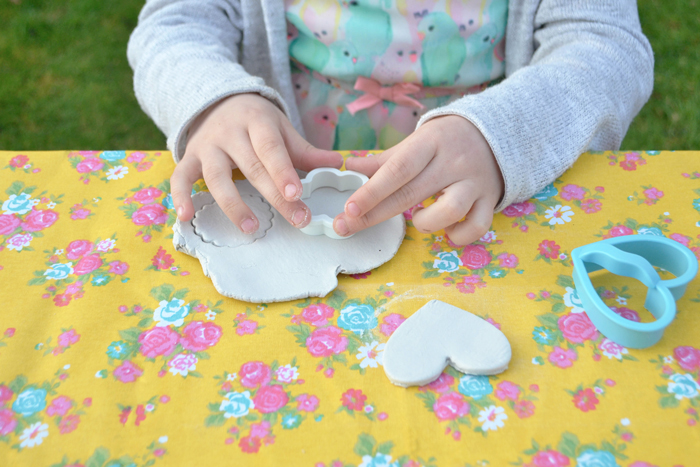
Use a skewer or a pencil to make a small hole in each shape, so you can thread it onto string later.
Now leave your shapes to dry out completely. The drying time will vary according to the brand of clay you are using and the thickness of your pieces, but roughly 24 hours should be enough.
Part 3: Decoupage
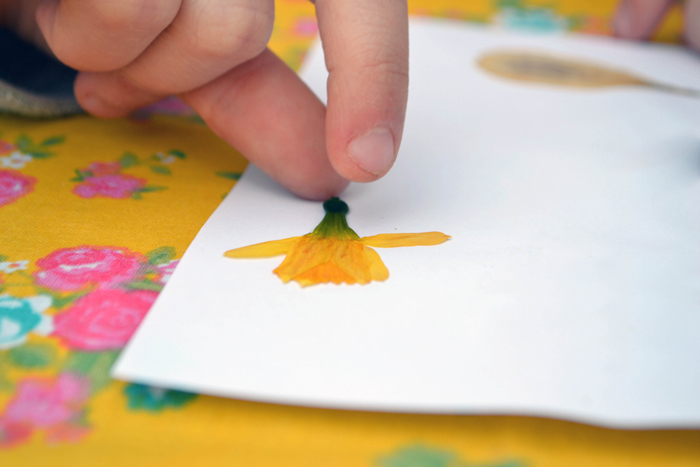
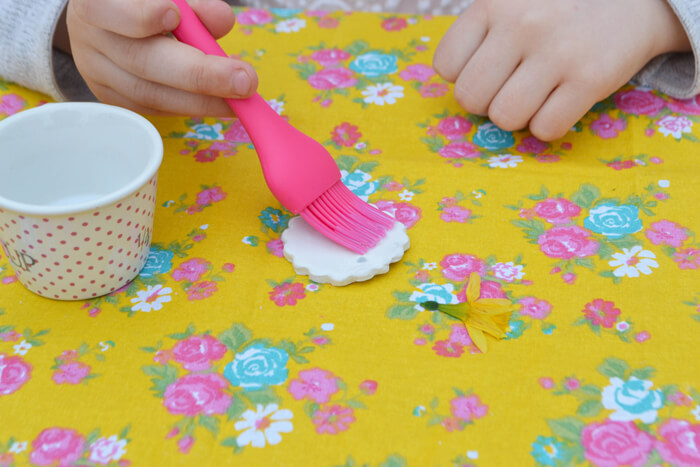
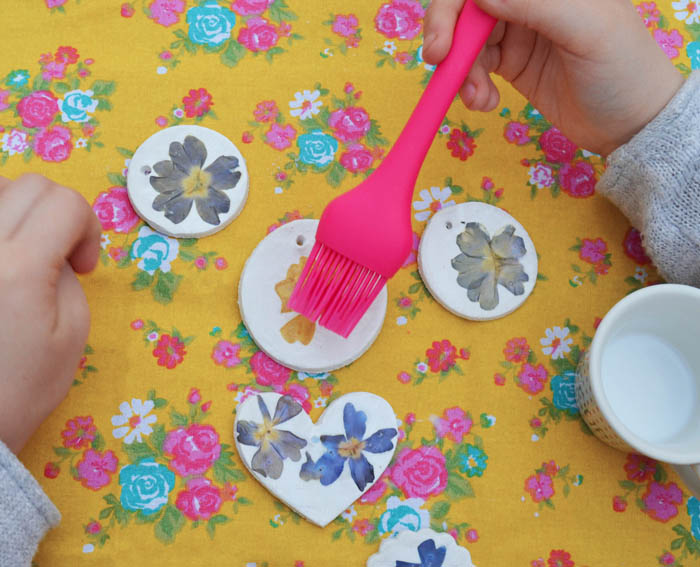
Once your clay pieces are all dry, and your flowers are completely dry too, it's time to finish your project with some decoupage!
We're using a generic decoupage medium, which acts as both an adhesive and a sealant. Add one layer to each piece.
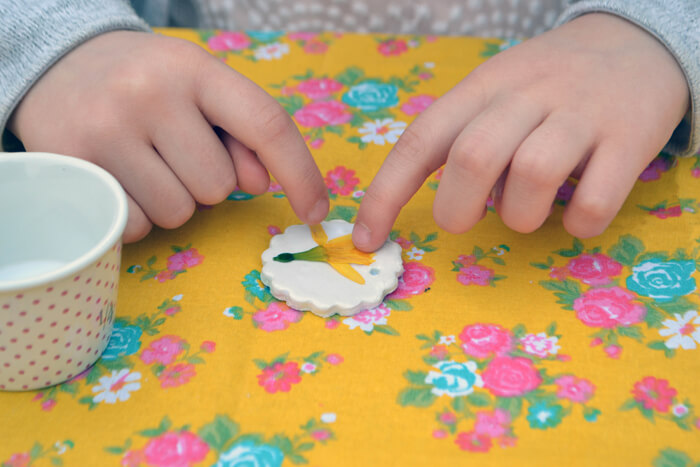
Carefully place your pressed flower on top, taking care not to fold or damage it.
And seal the flower with another layer of decoupage medium. You may want to seal both sides, or add a flower to both sides, it's up to you!
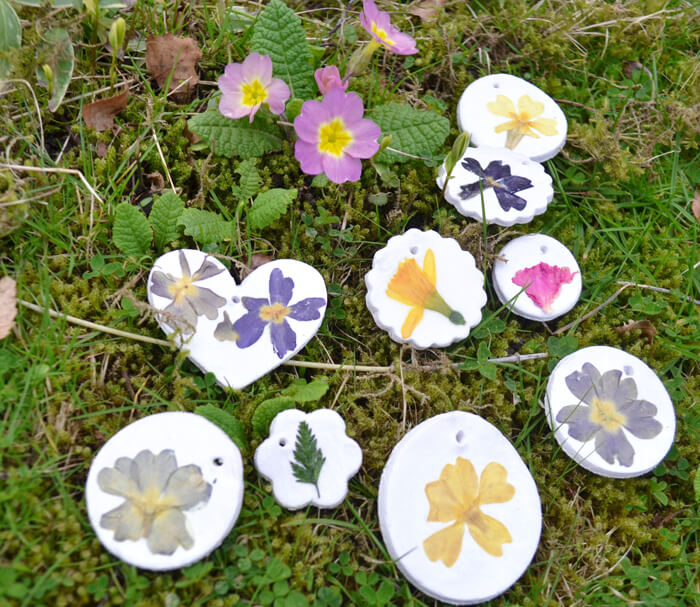
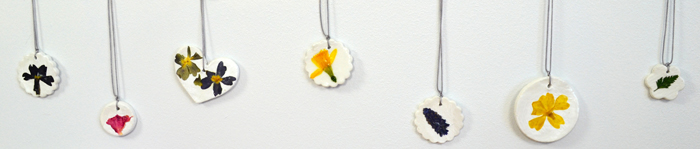
Experiment with different types of flowers, and get creative with different layouts and positions. No two are alike!
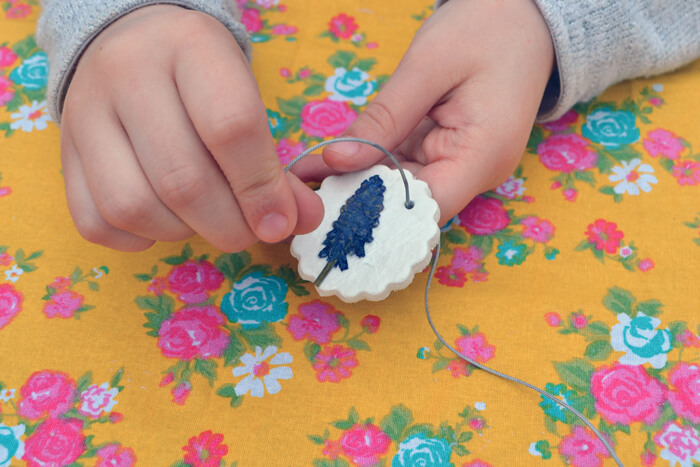
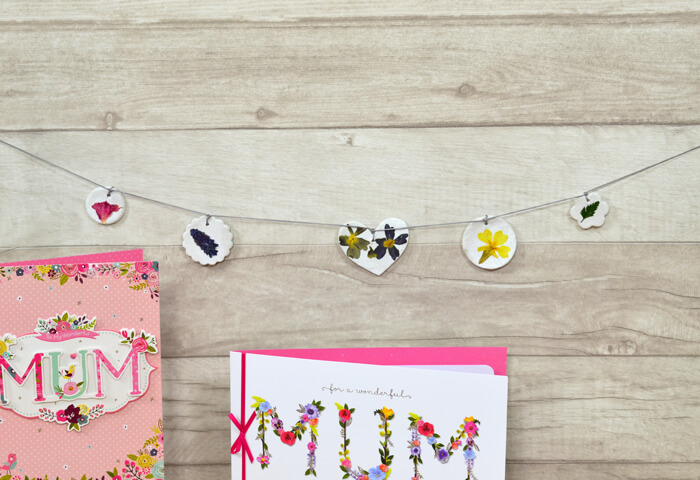
Once dry, you can add string or jewellery thread to your piece.
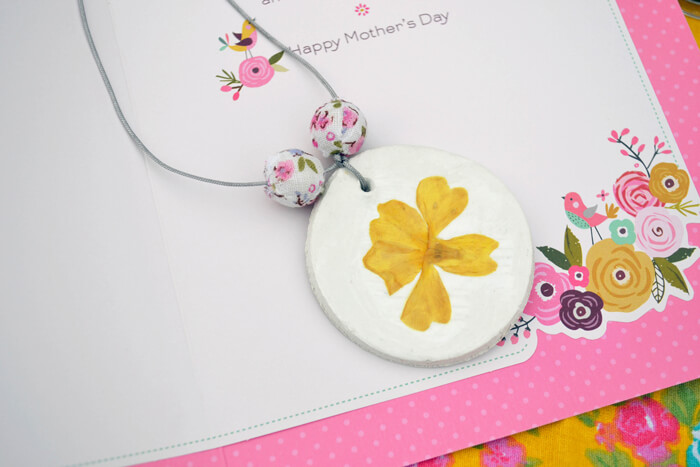
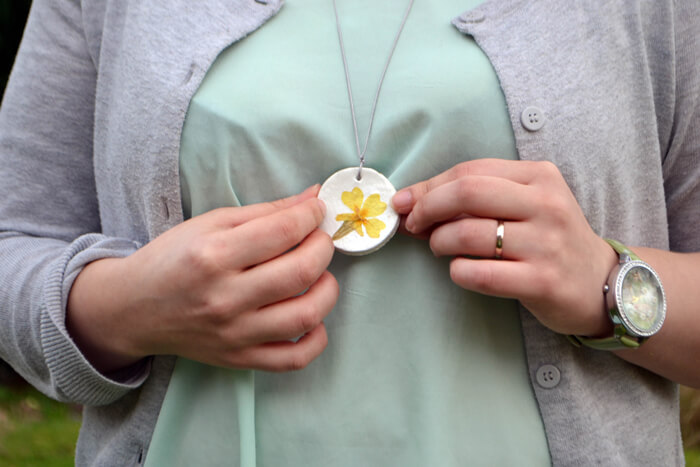
And now it's ready to present or use however you wish!
These make a lovely, shabby-chic handmade necklace (much prettier than macaroni threaded on a string!)
Or thread several onto one long piece of string like bunting:
Or hang individually to create spring-themed mobiles and wall hangings
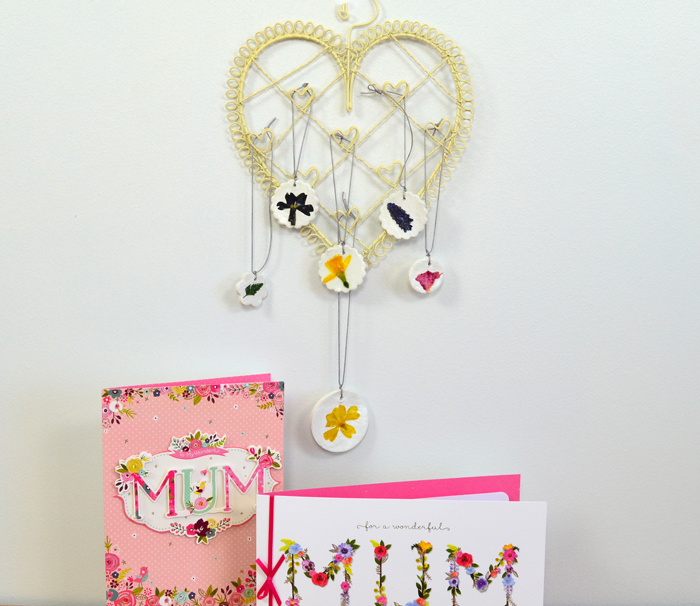
However you choose to enjoy them, they're a great way to make the most of the spring flowers and preserve them for years to come.