
Pumpkin Carving Survival Guide

Have you ever wondered why we celebrate Halloween by mutilating innocent pumpkins? Or pondered how on earth people carve these otherwise dull vegetables into glorious pieces of art? If you answered yes to either of the above then you need to read on and learn about out why we carve pumpkins at Halloween and how to carve your very own pumpkin. We've also put together a selection of our favourite pumpkin carvings from around the web to help give you some pumpkin ideas of your own.
Why Do We Carve Pumpkins At Halloween?
We're sure you're wondering just why pumpkins are so important at Halloween? Well the carving of pumpkins at Halloween is a time old tradition that has been around for many centuries and there is debate as to where exactly it originates from. Some say it was the Celts who used to carve pumpkins into lanterns as a way of warding off evil spirits during the Samhain festival. Spooky
The more commonly known origin is that the ritual dates back to the tale of a drunken Irish farmer nicknamed "Stingy Jack". Stingy Jack lived a life of sin making deals with the devil, and upon his death as punishment for his sins, Stingy Jack was turned away from both Heaven and Hell, trapping his soul in purgatory forever.
The devil gave Jack a burning coal which he used to make a lantern by carving out the insides of a turnip and putting the coal inside. With only this lantern to light his way, the ghost of Stingy Jack was forced to wander the underworld for the rest of eternity. The tale tells that Stingy Jack will return every Halloween to terrorise the people of Earth. Appropriately, he was given the nickname 'Jack of the Lantern' or 'Jack O'Lantern' as they're more commonly known. Our ancestors made lanterns of their own to keep him at bay so next time you're carving your own Jack O'Lantern, be sure to remember the ghost of Stingy Jack.
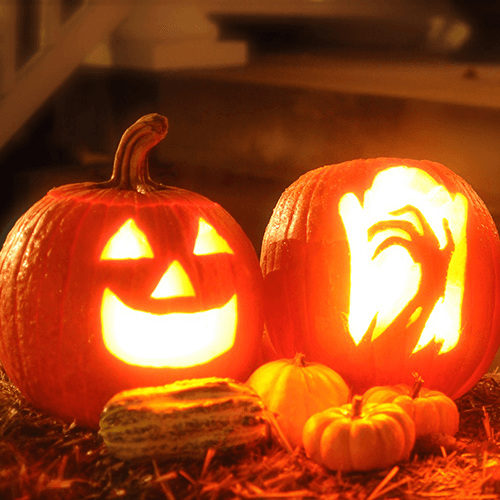
Pumpkin Carving Ideas
To help you on your merry pumpkin carving way, we've put together a selection of the most spine-chilling, mind-boggling, and quite frankly ridiculous pumpkin carvings from around the web. These pumpkin designs show that with a bit of practise and the right tools, you can carve just about any sort of pumpkin lantern you want.
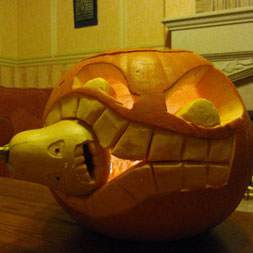
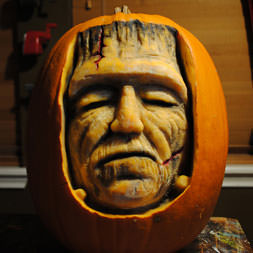
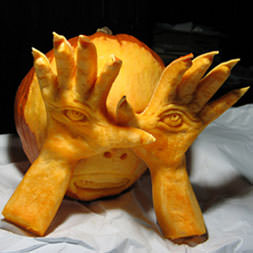
Check out these Pumpkins made by some of our very talented colleagues
Step 1: Choosing Your Pumpkin
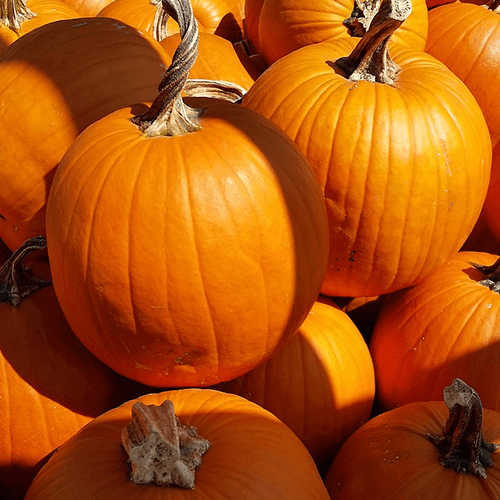
First you need to find yourself a pumpkin (even the best pumpkin carvings begin as normal pumpkins!). As Halloween season approaches you'll be able to buy a pumpkin from most supermarkets or fruit and veg shops. A few points to bear in mind when selecting your pumpkin:
Choose a medium to large sized pumpkin. This will allow plenty of space for your carving and enough strength for the pumpkin to support itself.
Avoid pumpkins with bruising or mould as these will be difficult to carve and will decompose faster.
Pumpkins that are lighter in colour tend to be softer and easier to carve.
Try to pick one with a smoother surface and less ridges, as this will be easier to cut your carving into.
Step 2: Cut Off the Lid
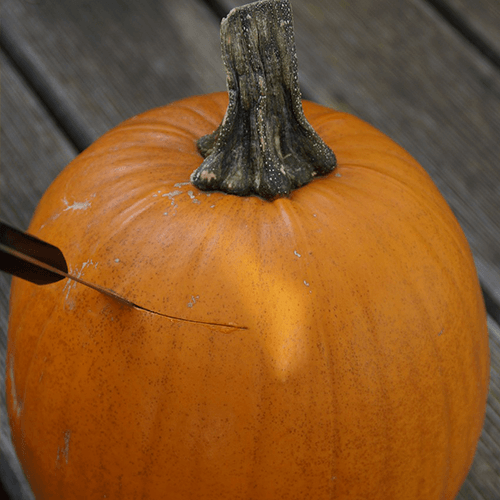
Before you begin carving the pumpkin you need to create a lid for it. To do this, cut a square or hexagonal shape around the stem on top of the pumpkin. Be sure to cut in at a slanted angle (this will ensure you leave a ridge which will stop the lid from falling through). When you've finished cutting, yank sharply on the pumpkins stem and it will come off. It may take a bit of pulling so be careful not to damage your pumpkin.
Step 3: Scoop Out the Insides
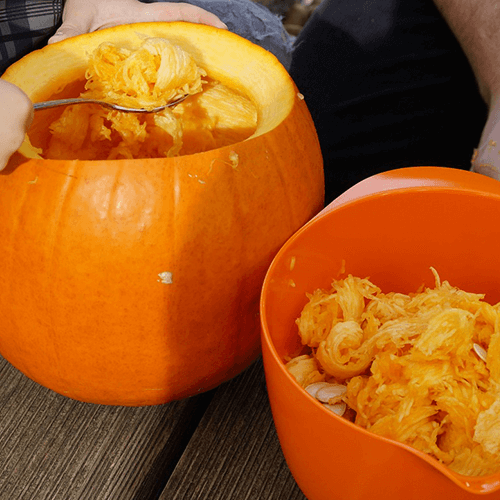
Now for the messy bit. Use a large kitchen spoon or ladle (we've found ice cream scoops work well) to scoop out the inside of the pumpkin. Try to leave about 1 inch around the edge of the pumpkin to form its wall, this should be deep enough for the pumpkin to support itself and thin enough for you to cut through. Shave down the inside of the pumpkin with a spoon to create a smooth surface, this helps to reflect the candles light and the lantern will be brighter when it's lit. Some people also like to keep the pumpkin seeds for roasting.
Step 4: Mark Out Your Template
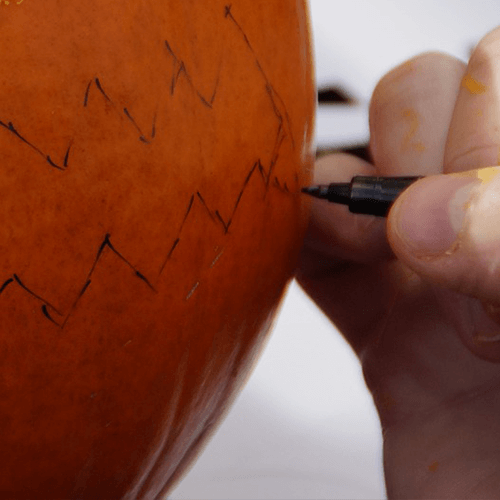
You need to decide on a design or pattern to carve into your pumpkin. Some people like to draw their own design directly onto the pumpkins skin, others find it easier to work from a guide or template. There are lots of Halloween pumpkin templates on the Internet so have a look and you'll be sure to find one you like. If you're not confident at something extravagant, a simple design can be just as effective at spooking passers-by. Choose the flattest side of your pumpkin and attach your carving template to it. The easiest way to do this is with some sticky tape in each corner. If the paper is rigid and you're having difficulty sticking it to the pumpkin, make some small tears in the sides which will help you flex it into shape. Now find something small and sharp (a pin or small nail works well) and score out the path of your carving template by marking shallow holes through the template into the pumpkin. These don't need to cut in too deep, just enough so that the pattern is clearly visible. Once you've finished marking out the path of your template, lightly join the dots together with a marker pen.
Step 5: Carve Out Your Design
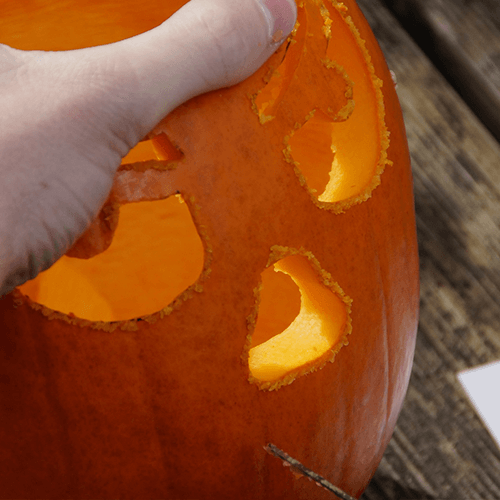
Now it's time to bring your pumpkin lantern to life. To carve the design, you will need a long serrated knife with teeth running along the blade. Begin by cutting into your pumpkin at one of the points you marked out (it's normally easiest to start in a corner). Carve along your guidelines very slowly using a saw-like motion but beware! If you carve too quickly you'll damage the pumpkin and ruin your design. This stage can take a while but it will be worth it in the end, so we definitely recommend taking your time! Once you've finished carving out your pattern, it's a good idea to cut a hole near the top to act as a chimney allowing the heat and smoke to escape the lantern.
Step 6: Finishing off Your Pumpkin
Because of their shape, pumpkins can occasionally be a bit unsteady when placed on a surface. You can get around this by shaving a bit off the bottom of the pumpkin. This creates a flatter base and adds some stability. As a final step, sprinkle the pumpkin with cinnamon or nutmeg. When you burn a candle inside the pumpkin, they will create a flavoured scent doubling your pumpkin as a home-made air freshener. Congratulations! You've just carved your first Halloween pumpkin. Feel free to go ahead and proudly show off your Jack O'Lantern on your front porch, and at the same time scare away those annoying Trick or Treaters. Boo!